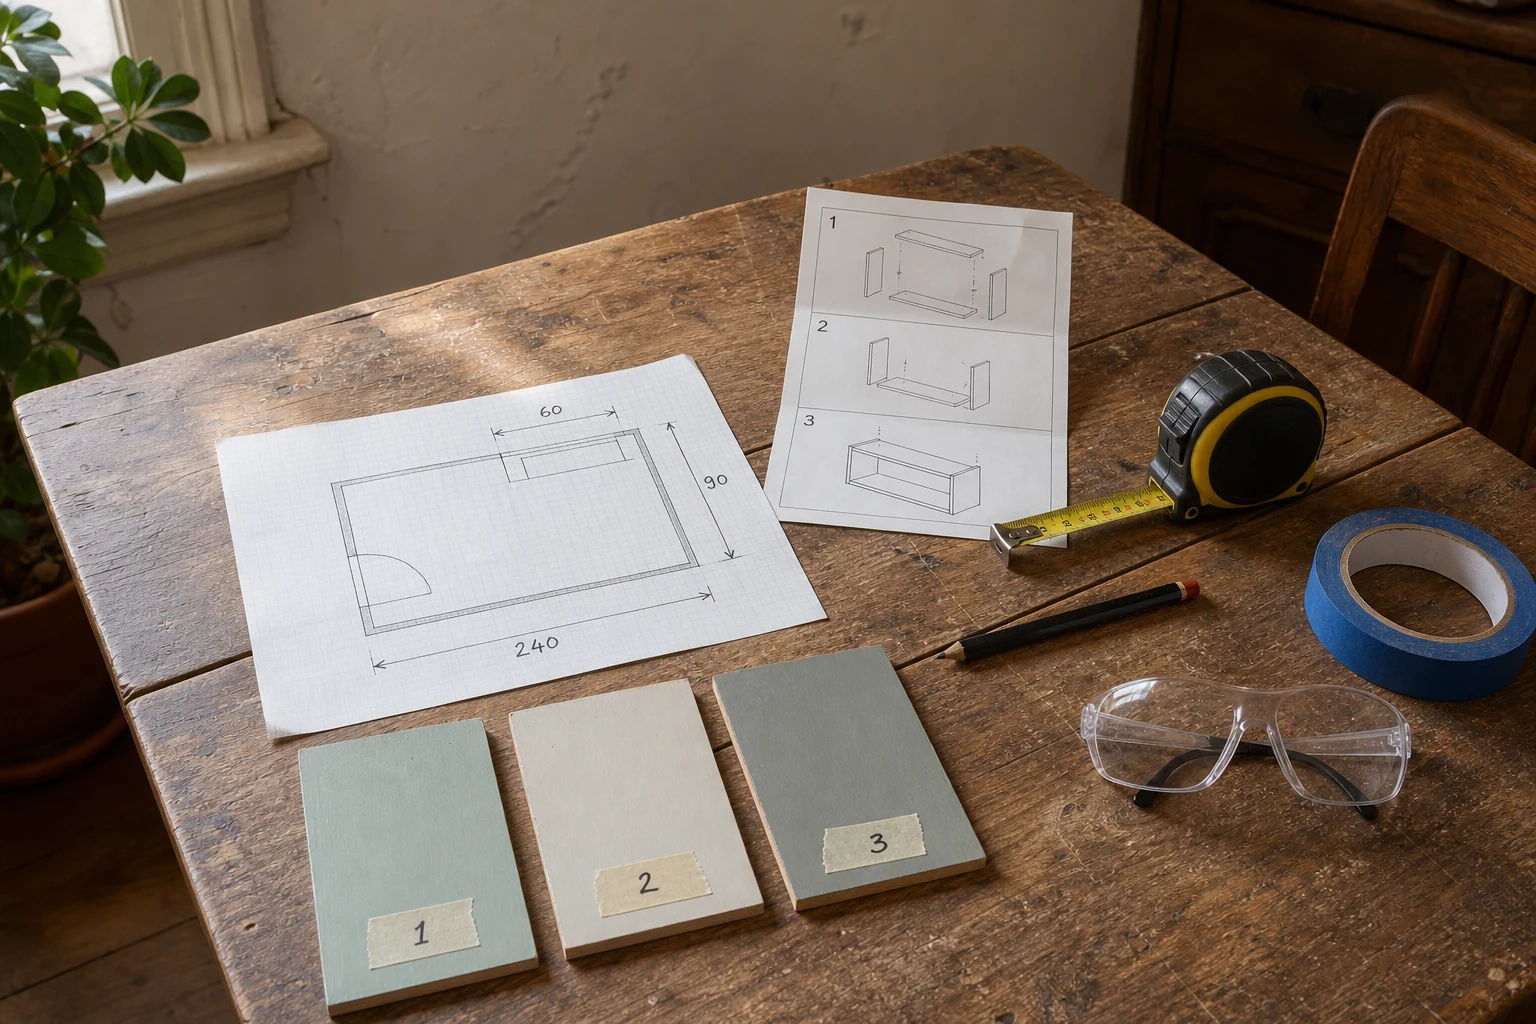
The safest, least wasteful DIY projects begin before the dust sheet goes down. They begin with an exact problem, a measured area, a small test and an honest decision about whether the work is appropriate to do yourself.
A loose handle, stained wall or cracked finish can look like a simple Saturday job. Sometimes it is. Sometimes the visible flaw is only the symptom: water is entering from somewhere else, movement is continuing, the surface contains an older hazardous material, or a fixing must carry more weight than the wall can safely support.
This guide is a planning framework, not a technical manual for regulated work. It helps you define the finish line, check the building and your permissions, test materials, select suitable tools and personal protective equipment, protect the people around the project and recognise the moment to stop. Local law, product instructions and a competent professional always take priority over general online guidance.
The measure–test–safety check at a glance
| Check | Question to answer | Evidence to collect | Reason to pause |
|---|---|---|---|
| Purpose | What exact problem should the finished work solve? | One-sentence brief and a photograph | The project is only “make it nicer” with no finish line |
| Cause | Is the visible defect active or only cosmetic? | Dates, moisture or movement observations, previous repair history | Leak, damp, heat, structural movement or electrical symptoms |
| Dimensions | What must fit, open, clear, align or carry weight? | Measured sketch with services and obstacles | Measurements disagree or hidden construction is unknown |
| Authority | Do you have permission, and is the work legally DIY? | Lease, strata/HOA rules, permit guidance, written approval | Permission or local requirements are unclear |
| Hazards | What could the work expose, release, cut or destabilise? | Building age, material records, product safety data, professional test | Suspected asbestos, lead, gas, live electricity or structural work |
| Test | Does the material bond, cure and look right here? | Labelled sample and observation after full cure time | Reaction, poor adhesion, staining, damage or uncertain compatibility |
| Recovery | Can the area be left safe if the project takes longer? | Stop point, clean-up plan and disposal route | The room, water, power or exit cannot be restored safely |
1. Define one finishable job
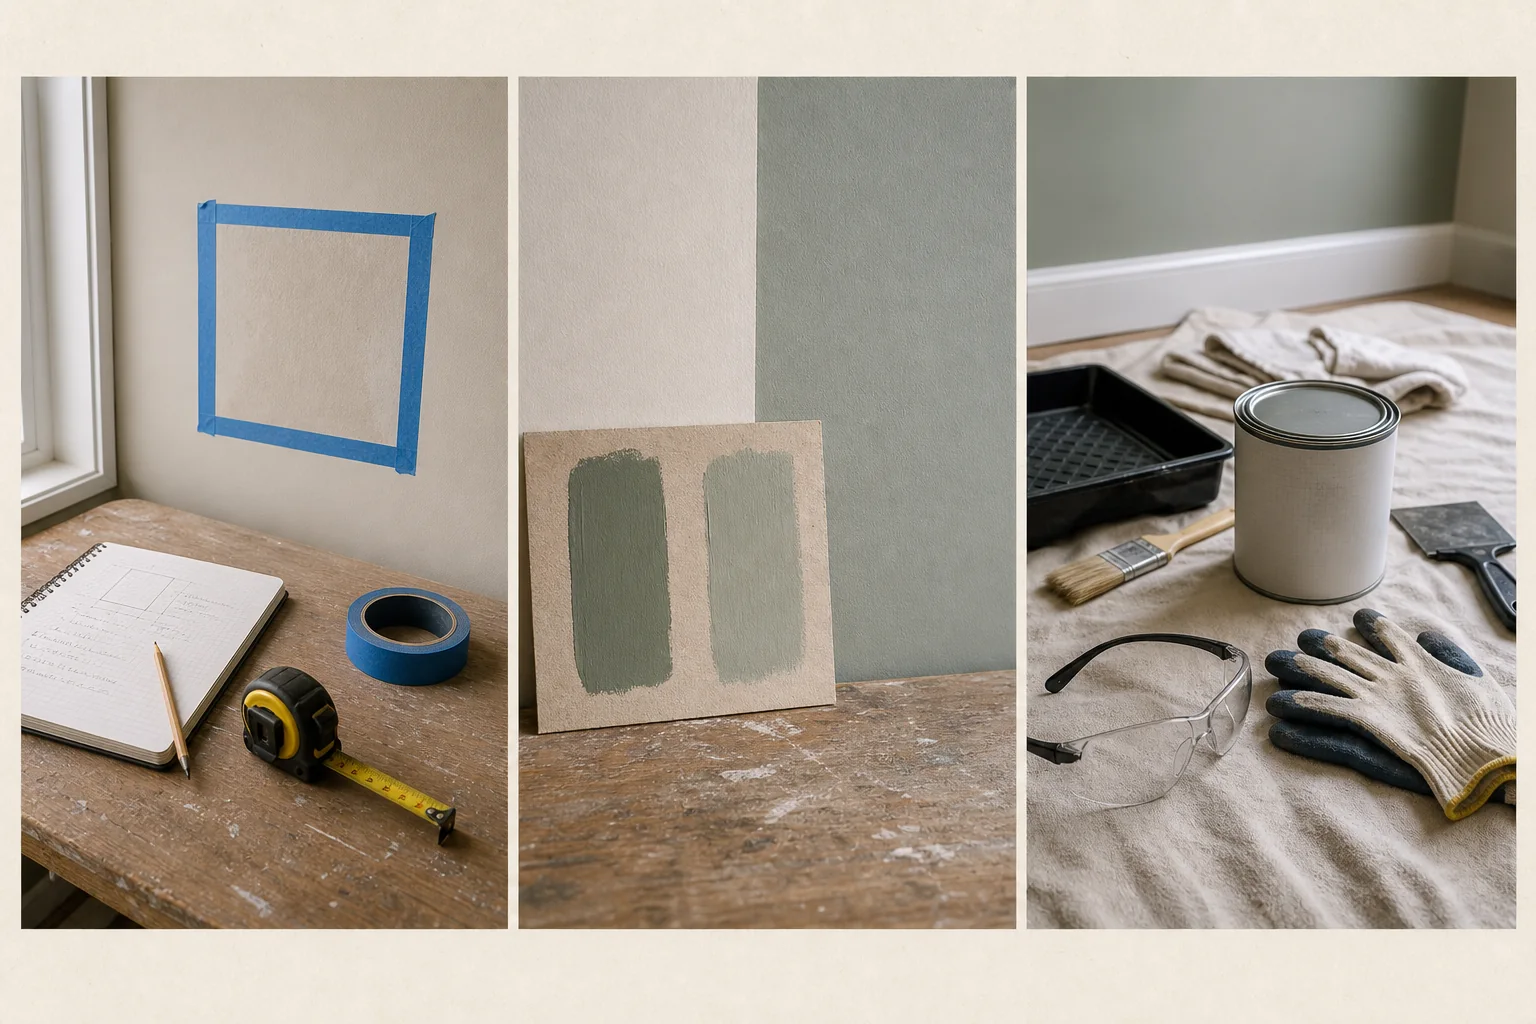
- 01Mark the scope
- 02Test off-stage
- 03Stage the safe zone
“Refresh the bathroom” is not a project. It is a collection of possible projects with different tools, materials and risks. “Prepare and repaint the sound, dry wall above the towel rail without removing fixed electrical fittings” is a scope you can assess.
Write a one-sentence brief with four parts:
Change this specific thing, in this bounded area, to achieve this practical result, while leaving these elements untouched.
Then define “done” in observable terms. The door opens fully. The shelf is level and carries the stated load. The repaired surface is dry, stable and ready for its final finish. The room can be cleaned and used safely. A finish line prevents a small job from expanding into improvised demolition.
List the exclusions
Exclusions are not pessimism; they are control. Your list might say: no moving plumbing, no altering wiring, no drilling until services are located, no sanding an older coating until its composition is assessed, and no work that affects the landlord’s fixture. If an exclusion becomes necessary, the original project stops and a new decision begins.
Photograph the area from near and far. Record the date, what changes through the day and anything already damaged. This is useful for planning, permission and later comparison. It is not evidence of a dramatic “before and after” unless the work is genuinely completed and documented.
2. Diagnose the cause before the cosmetic finish
Paint does not repair a leak. Filler does not stabilise continuing movement. Sealant does not solve a failed waterproofing system simply because it hides the gap for a week.
Before covering a defect, ask what changed:
- A stain: Is it dry and historic, or does it darken after rain, plumbing use or air-conditioning?
- A crack: Is it limited to a brittle surface finish, or is it widening, recurring or associated with movement in doors, floors or masonry?
- Peeling paint: Is the substrate dusty, damp, contaminated, poorly prepared or incompatible with the coating?
- Loose hardware: Did a screw simply work free, or is the fixing unsuitable, the material damaged or the object too heavy?
- Musty odour or visible growth: Is moisture still present? Cleaning the mark without controlling the water source is not a complete repair.
Observe rather than guess. Mark the ends of a non-structural surface crack with a removable note and date, photograph a stain in the same lighting, and record when the symptom appears. Do not probe, cut or sand a suspect material merely to identify it.
3. Measure the whole project, not only the surface
A wall may be 180 centimetres wide, but that number does not tell you whether a cabinet door can open, a curtain can stack beside the window or a drill point is clear of services. Good project measurements describe relationships.
Make a measured sketch
- Draw the overall width, height and depth of the project area.
- Add doors, windows, frames, skirtings/baseboards, cornices, handles and anything that opens or projects.
- Mark visible sockets, switches, plumbing, vents, detectors, radiators, air-conditioning units and access panels. Their visible position does not reveal every hidden service.
- Record floor, wall and ceiling irregularities at more than one point. Older rooms are not always square or level.
- Add the dimensions of the object, its fixings and the space needed to install, maintain or remove it.
- Measure the delivery route: entrance, lift/elevator, stair, corner and doorway.
Write units beside every number. Mixing millimetres, centimetres and inches creates avoidable errors. For a product specified in another unit, convert once and keep both values on the plan. Do not round a safety-critical or fabrication measurement casually.
Measure twice in different ways
For a shelf, compare the wall span with the shelf itself. For a panel, measure top, middle and bottom. For a floor, compare the calculated area with a second length-by-width check and add only the product-appropriate cutting allowance recommended by the supplier. If the numbers disagree, find the reason before ordering.
Use removable tape or cardboard to show the finished footprint. Open every nearby door and drawer. Walk the route. Reach the control. This simple mock-up catches more practical mistakes than a perfect scale drawing alone.
For a room-scale example, see why furniture depth, arms and operating clearance matter as much as width. The same principle applies to cabinets, shelves and built-in projects.
For two practical examples of measuring relationships before buying, use the curtain height-and-width worksheet and the living-room rug tape test. Both turn a product dimension into a plan that includes openings, routes and daily use.
4. Check permission, codes and product requirements
Owning a home does not make every alteration unregulated, and renting does not mean every reversible change is automatically allowed. Requirements vary by country, municipality, building type and shared-property arrangement.
- Renters: read the lease, ask about drilling, decorating and reinstatement, and keep written approval.
- Apartments and shared buildings: check strata, condominium, co-op or homeowners’ association rules, working hours and common-service restrictions.
- Owners: check whether permits, inspections or licensed trades are required for the proposed work.
- Everyone: follow manufacturer instructions, load ratings, cure times, compatible substrates and ventilation requirements.
- Heritage or protected properties: obtain the appropriate advice before removing or altering original material.
“No permit needed” is not the same as “no safety rules apply.” Equally, a tutorial filmed in another country does not establish what is legal in yours. Use the current website or office of the relevant building authority, utility, property manager or landlord.
Keep product labels and instructions until the work is finished. Photograph batch numbers and colour codes. If a later repair is needed, that information can be more useful than the receipt.
6. Test the material, colour and method
A good test is small enough to limit damage but realistic enough to reveal the result. It uses the actual substrate, preparation, primer, product and tool planned for the project.
- Choose a representative area. A hidden corner can show compatibility but may receive different light, wear or moisture. Use a removable sample board as well when appearance matters.
- Prepare exactly as directed. A test on an unprepared surface does not predict the finished work.
- Label it. Record product, colour, dilution if permitted, tool, coat number and date.
- Wait the full stated time. Touch-dry is not the same as cured. Adhesion, hardness, colour and sheen can change.
- Inspect in real conditions. View colour by day and night. Test a cleaning method only after cure. Open the nearby door, run the shower or use the room as normal where appropriate.
- Stop if the test fails. Bubbling, staining, poor adhesion, softening, unexpected odour, heat or damage needs diagnosis—not a larger test.
For a fixing, the “test” is not hanging something heavy and hoping. Confirm the substrate, fixing type, load direction and rated capacity through the product instructions or a competent professional. Include the weight of the object and anything it will hold, plus the consequences if it falls.
7. Choose tools and protection for the actual hazard
Owning a tool does not make it suitable. Choose the method first, then the tool, guard, accessory and personal protective equipment (PPE) specified for that method and material.
- Read the tool manual before use, including the correct accessory, speed, guard and workpiece support.
- Inspect tools, batteries, plugs and leads. Do not use damaged equipment or defeat a safety guard.
- Use eye, hearing, hand, foot, skin or respiratory protection matched to the hazard and product guidance.
- Remember that PPE is the final layer, not a substitute for removing the hazard, using a safer method or controlling dust at the source.
- A simple nuisance-dust mask is not suitable for every dust, vapour or hazardous material. Respirator type, fit and use matter; seek authoritative advice for the exposure.
- Secure the workpiece. Do not hold a small item in one hand while operating a cutting or drilling tool with the other.
- Keep children, pets and bystanders out of the work area and store tools securely during breaks.
U.S. Occupational Safety and Health Administration guidance is written for workplaces, but its basic principles are relevant: tools should be kept in safe condition, guards should remain in place, and protection should match flying, abrasive, splash, dust, fume and other hazards. Home users must still follow local consumer guidance and the specific manual.
8. Set up a controlled work zone
Controlled work zone
The project footprint is larger than the surface being changed.
Plan the tool landing, protected route, ventilation, and cleanup path.
- Work faceThe finishMeasured and reachable.
- Tool landingStable zoneNothing balanced in the route.
- Clean exitDust pathContain and remove safely.
A dust sheet is not a complete plan. Decide how people will move, how dust or wet materials will be contained, where tools will rest and how the area will be made safe at the end of the day.
- Remove movable furnishings and anything that could be contaminated or damaged.
- Keep doors, required exits, stairs, detectors, electrical panels, shut-off controls and ventilation routes available.
- Protect floors with a material suitable for the task and secure edges so the protection does not become a trip hazard.
- Provide the ventilation required by the product without spreading hazardous dust through the home.
- Set a clean area for instructions, phone, first-aid supplies and drinking water—away from chemicals and dust.
- Plan safe tool and waste storage for every break.
- Tell household members what is happening, what they must not touch and when the room will be usable again.
Use ladders only when the setup is right
The U.S. National Institute for Occupational Safety and Health notes that ladder incidents also happen at home and identifies wrong selection, poor inspection, incorrect setup, overreaching and carrying objects while climbing as common causes. Use the correct ladder type and duty rating, inspect it, place it on a firm level surface, keep your body centred and climb with hands available. Do not stand on furniture, a bucket or an improvised platform.
If the task needs prolonged reaching, sideways force, heavy tools or work near electrical hazards, a different access method or a professional may be safer.
9. Know the stop-and-call boundary
Competence includes knowing what not to start. Stop and obtain qualified advice when the work involves—or unexpectedly reveals—the following:
| Condition | Why general DIY advice is not enough |
|---|---|
| Gas appliances, supply or suspected leak | Fire, explosion and poisoning risks; licensed work is required in many places |
| Fixed electrical installation, repeated tripping, heat, sparks or burning smell | Shock and fire risk; legal scope and safe isolation vary by jurisdiction |
| Load-bearing structure, roof, balcony, balustrade or major movement | Failure can affect the building and people beyond the work area |
| Active leak, waterproofing failure, sewage or concealed decay | The cause and extent must be resolved before finishes |
| Suspected asbestos, lead or unknown hazardous material | Testing, containment, removal and waste may be regulated |
| Work at height beyond a stable, straightforward ladder task | Falls can have severe consequences and require proper access equipment |
| Any task you cannot leave safe if interrupted | A delay, missing part or emergency can turn incomplete work into a household hazard |
“Call a professional” should not mean hiring the first person available. Check the licence or accreditation relevant to the work, insurance where appropriate, written scope, exclusions, product specifications and who is responsible for permits, protection and waste.
10. Plan the work, stop points and clean-up
Write the sequence before opening materials. A dependable plan generally moves from investigation and protection to preparation, repair, finish, cure, reassembly and clean-up. Some systems require different sequencing, so the product and technical instructions lead.
Build in safe stop points
A safe stop point is a stage where the room can remain overnight without exposed hazards, unsecured loads, wet chemicals within reach or disabled essential services. If the project cannot reach one before your available time ends, reduce the scope or postpone it.
Buy for the plan, not the mood
Make a list under five headings: protection, preparation, repair, finish and clean-up. Check what you already own and whether it is still safe and compatible. Buy the smallest sensible quantity, but do not improvise with an unsuitable product to avoid a second trip.
The Dealsmaster shop-without-waste checklist is a useful final filter for any decorative item or piece of furniture that becomes part of the project.
Plan the waste route
Paint, solvents, batteries, electrical items, contaminated dust and demolition material may require different disposal. Check the local authority and product instructions before the project. Do not pour leftover material into drains or assume that “recyclable” packaging belongs in every local recycling system.
Inspect before calling it finished
- Has the underlying cause been addressed?
- Is the finished work stable, dry/cured and operating as intended?
- Are guards, covers, detectors, vents and access panels restored?
- Are tools, fixings, sharp fragments and chemicals removed?
- Can doors, windows, exits and controls operate fully?
- Does the work need a formal inspection, sign-off or landlord check?
- Have you saved the product, colour, batch and maintenance information?
A 45-minute DIY planning session
- Minutes 0–5: name the problem. Write the one-sentence project brief and exclusions.
- Minutes 5–10: record the evidence. Photograph the area and note when the symptom appears or changes.
- Minutes 10–20: measure and sketch. Add obstacles, openings, services, access and the proposed finished footprint.
- Minutes 20–25: check authority. List the permission, permit, building-rule or manufacturer information still needed.
- Minutes 25–30: screen the hazards. Note building age, unknown materials, electricity, gas, water, height, dust and load.
- Minutes 30–35: design the test. Decide what small sample or mock-up will answer the biggest uncertainty.
- Minutes 35–40: plan the stop point. Choose how the area will be left safe if work pauses.
- Minutes 40–45: make the decision. Proceed, gather more information, obtain permission or hand the job to the right professional.
A decision not to DIY can be a successful outcome of this process. You have avoided turning uncertainty into damage and can brief a professional with clearer evidence.
The before-you-start checklist
- The problem, area, result and exclusions are written down.
- The visible defect has a plausible, stable cause—or is being assessed.
- Dimensions, openings, access and delivery routes are recorded in consistent units.
- Permission and local legal requirements are confirmed.
- Old or unknown materials have been screened before disturbance.
- The planned method follows current manufacturer instructions.
- A representative test has been allowed to cure and inspected.
- Tools, guards, accessories and PPE match the task.
- The work zone protects household members, routes and essential controls.
- The project has a safe stop point and enough time to reach it.
- Waste and clean-up have legitimate destinations.
- The stop-and-call boundary is understood before work begins.
Frequently asked questions
What is the best first DIY project?
Choose a low-consequence, reversible job with a clear finish line and no hidden services, hazardous dust or work at height. Rearranging hardware on a freestanding item, testing a decorative finish on a sample board or repairing a simple non-structural object according to its instructions may be more suitable than beginning with walls, plumbing or wiring.
How do I know whether a wall is safe to drill?
You need to understand the wall construction, potential services, fixing type and load. Visible sockets and pipes provide clues but do not map everything hidden. Detectors have limitations. If you cannot establish a safe fixing position and method, do not drill; consult the building information or a competent professional.
Can I paint over a water stain?
Only after the water source is identified and resolved, the assembly is appropriately dry and sound, and the chosen preparation and coating system is suitable. A stain that changes, feels damp or accompanies swelling, odour or growth needs assessment before decoration.
Is a dust mask enough for sanding?
Not necessarily. The hazard depends on the material and process, and respiratory protection must be suitable and fit correctly. Older coatings or boards may contain hazardous substances that should not be sanded casually. Identify the material and follow authoritative product and safety guidance first.
Do renters need permission for removable improvements?
Possibly. “Removable” products can still damage finishes, interfere with safety devices or breach a lease. Check the agreement and ask in writing when uncertain. Keep the approved method and reinstatement requirements.
When should a crack worry me?
A new, widening, recurring or displaced crack—especially with sticking doors, sloping, water entry, sagging or other movement—deserves qualified assessment. Online width rules cannot diagnose a building. Do not hide an active symptom with filler.
How much extra material should I buy?
Use the manufacturer’s or supplier’s allowance for the specific material, layout and batch requirements. Pattern repeat, cuts, breakage, future repair and return policy all matter. A generic percentage can cause either shortage or unnecessary waste.
What if the project becomes bigger after I start?
Stop at the safest available point, isolate the area from household use, document what was revealed and reassess the scope, permission and hazards. Do not keep removing material merely to “see how far it goes.”
A good DIY result begins with a good decision
The most satisfying home projects are not necessarily the most dramatic. They are the ones that solve the intended problem, respect the building, stay within the maker’s competence and leave the room safer and easier to use.
Measure the relationships, not just the surface. Test the method, not just the colour. Treat uncertainty as information. The pause before the project is not wasted time; it is where better work begins.
About the visuals in this guide
These are original Dealsmaster editorial illustrations produced with AI assistance for explanation and inspiration. They do not document a real household, tested installation, reader result, or professional inspection.
Safety sources and further guidance
These primary U.S. sources support the general hazard-recognition principles in this global article. Building dates, licensing, permits, exposure controls and disposal rules differ by jurisdiction. Use the current authority and qualified professionals where the property is located.
- U.S. Environmental Protection Agency: Lead-Safe Renovations for DIYers
- U.S. Environmental Protection Agency: Asbestos and Home Remodelling
- U.S. Environmental Protection Agency: Protect Your Family from Asbestos Exposure
- U.S. Occupational Safety and Health Administration: Hand and Power Tools
- U.S. Occupational Safety and Health Administration: Personal Protective Equipment
- U.S. National Institute for Occupational Safety and Health: Ladder Safety
Editorial note: This article helps readers plan and recognise boundaries. It does not certify competence or replace a site-specific risk assessment, permit, inspection, product manual or professional advice.