A tiny outdoor space can be generous enough for coffee, reading or dinner and still be too small for the furniture in your saved folder. The difference is rarely styling. It is whether the door opens, the drain stays reachable and a person can stand up without turning the whole layout into a furniture shuffle.
Start with the parts you cannot casually change: walls, railings, thresholds, openings, drains, service access and the route through the space. Watch what sun, wind and rain do next. Only then should you test a chair or table at full size.
That order sounds less exciting than shopping, but it answers the question that product photos cannot: will this setup work here, on an ordinary day, with the door moving and somebody carrying a tray?
The five-minute verdict
Before measuring every corner, make five marks on a rough sketch:
- the full movement of each door, gate and operable window;
- the drain, inspection cover, tap, socket, vent or equipment that must remain reachable;
- one continuous route from the interior to the main seat and any second destination;
- the exposed edge, railing, low sill or step that changes what can safely sit nearby;
- the wettest, windiest and hottest parts of the floor.
If the only possible chair blocks two of those five things, this is not a chair-shopping problem. Change the job of the space or choose a layout that can be reset after use.
Draw the fixed edges before the furniture
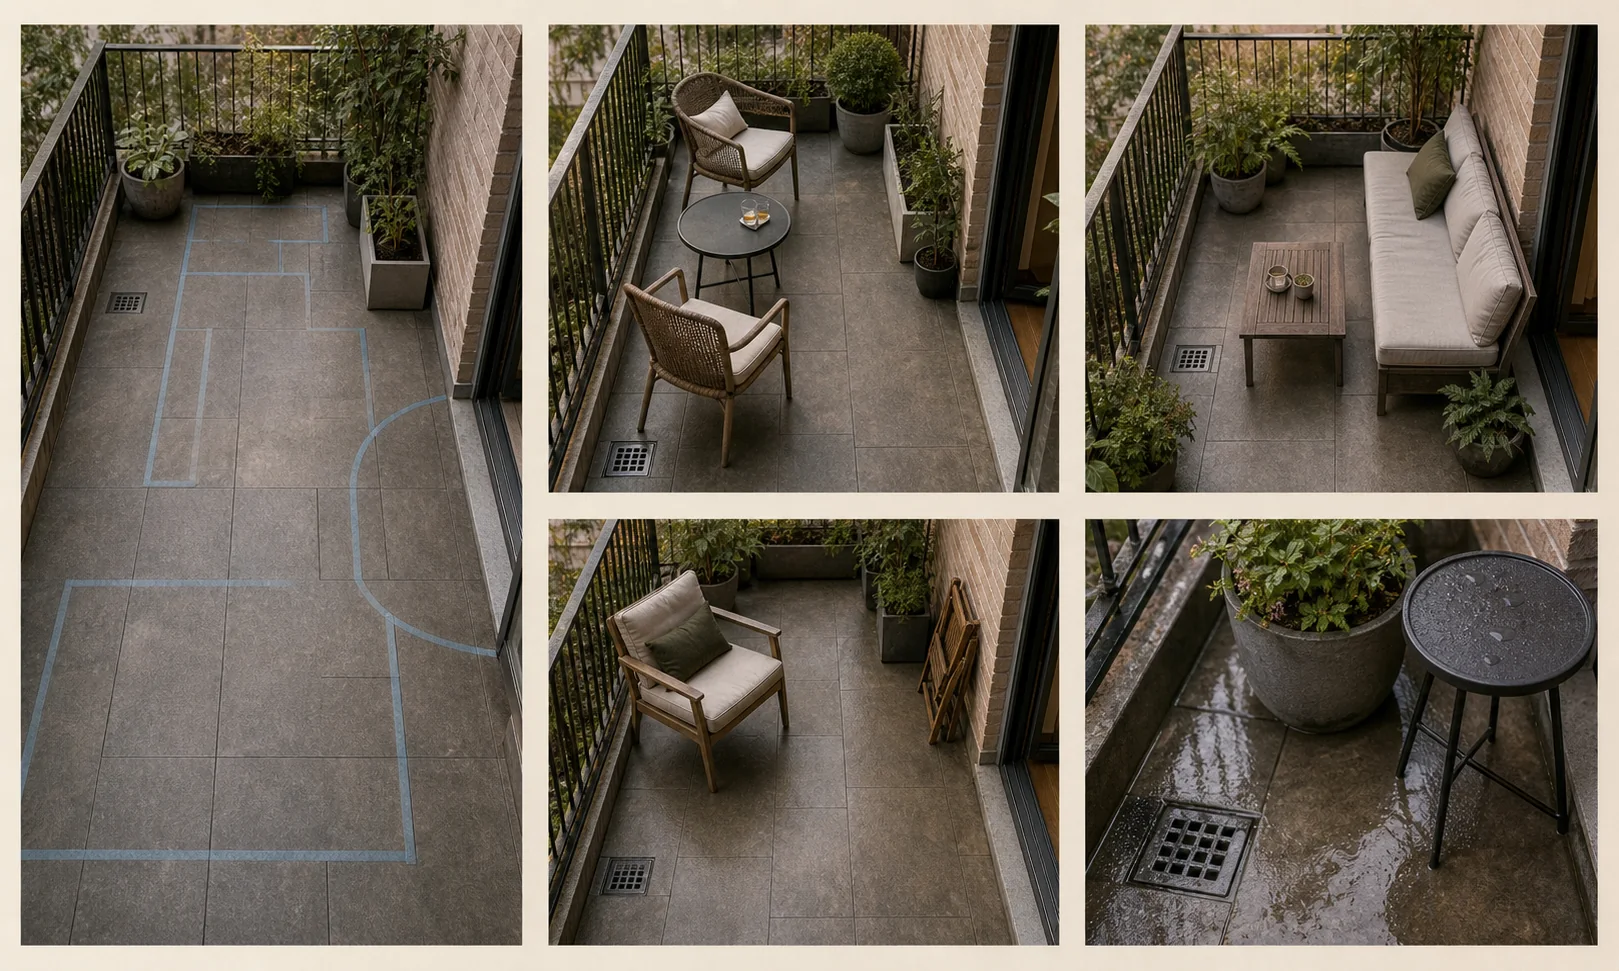
- 01Tape the fixed edges
- 02Two-person table
- 03Bench lounge
- 04Foldaway seat
- 05Rain + drainage
Measure the usable floor at its narrowest points. A balcony described as 1.7 metres wide may lose practical width to rail posts, a downpipe or a wall that is not quite straight. On a courtyard or tiny backyard, a gate, step, utility cover or second door can do the same job.
Record where each obstruction begins and ends. Include:
- door and gate movement, not just the opening;
- thresholds and changes in level;
- railings, parapets, columns, low sills and exposed edges;
- drains, inspection covers, taps, sockets, vents and service equipment;
- roof drips, runoff paths and places that stay damp;
- the route used when hands are full;
- surfaces or structures you are not permitted to drill, tie onto or alter.
A sliding door still needs a clean landing at the threshold. A drain that is technically visible beneath a sofa is not meaningfully accessible. If routine cleaning requires dismantling the entire setup, the layout has borrowed convenience from your future self.
Use the Dealsmaster DIY measure, test and safety checklist before any purchase, fixing or alteration. For this first sketch, accuracy matters more than beauty: a lopsided rectangle with the right door arc is more useful than a polished plan with the drain missing.
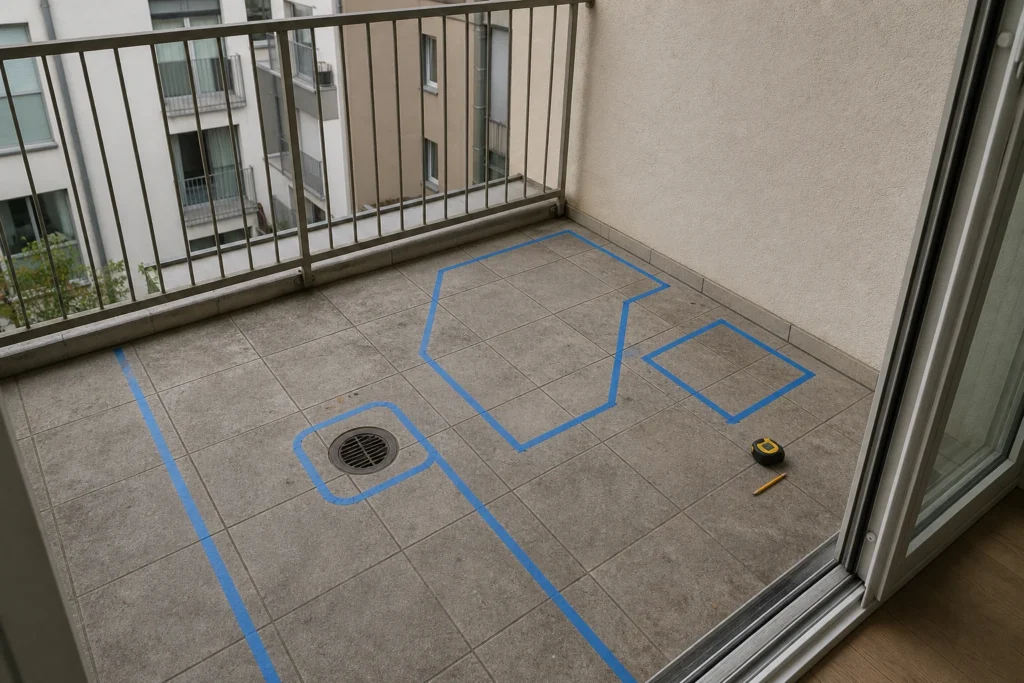
Read the weather at the time you will use the space
A plan drawn at noon can fail at 5 p.m. when glare lands on the reading chair or wind drives rain under the cover. Observe the space at more than one time of day and, if possible, after weather that reveals its weak points.
Write down what actually happens:
- where direct sun reaches in the morning and afternoon;
- where pale walls or glass throw glare;
- which corner channels wind;
- what gets wet despite an overhang;
- where water travels before it reaches a drain;
- whether an open door changes the wind or narrows the route;
- what would need to come inside after every use.
This is a placement test, not a universal planting or material prescription. Climate, exposure, maintenance and product instructions decide what belongs outdoors. An item sold for a covered patio may not suit wind-driven rain; an outdoor rug can still conceal drainage, hold moisture against a vulnerable surface or create a raised edge at a doorway.
Treat screens, umbrellas and awnings as separate approval and installation decisions. A heavy-looking base or an improvised tie to a railing does not prove that a product is suitable in wind. Check building rules and the manufacturer's limits for the exact item and exposure.
Protect the route, then furnish what remains
The most dependable small-patio rule is also the least photogenic: begin with the path. Give the floor left over a job.
Tape the route as a band, not a single line. Then rehearse four ordinary moments:
- enter and close the door;
- sit and stand while someone else remains seated;
- carry the tray, laundry basket, watering can or mobility aid that really passes through;
- reach the drain, utility point or second door without moving furniture.
Count furniture in its in-use position. A chair that must be pulled 35 centimetres into the route to be comfortable occupies that 35 centimetres. A folding seat needs both its open footprint and a safe storage place. A storage bench needs room for its lid and for the person opening it.
If accessibility matters, test with the actual person, mobility device and assistance pattern rather than a generic silhouette. As optional planning context only, the U.S. Access Board describes a 36-inch (915 mm) continuous accessible route, a 30-by-48-inch (760-by-1,220-mm) clear floor space and a 60-inch (1,525-mm) circular turning space in settings covered by its standards. Those dimensions are not a declaration that U.S. accessibility law governs a private balcony, nor are they a promise that a particular scooter, wheelchair or walking frame will manoeuvre in the same way. Applicable local rules and an individual assessment take priority.
Make a product footprint card before comparing styles
Once one layout survives the route test, turn every shortlisted item into a small specification card. A product's listed width and depth are only the beginning.
Record:
- the footprint while someone is sitting, including pulled-out chair space;
- the widest arms, feet or angled back—not only the seat cushion;
- the opened size of a lid, leaf, recliner or folding frame;
- the item's approved location and weather exposure;
- how it will be moved, cleaned beneath and stored;
- whether wind, an exposed edge or young children's access changes the risk;
- the return terms if the published measurements prove inaccurate.
Draw that footprint inside the taped outline. A “compact” chair may still be too deep; a round table may save corners but steal knee room; a storage bench may combine two jobs but demand a large opening arc. The useful comparison is not which piece looks lighter in a photograph. It is which complete in-use shape leaves the best route.
If you cannot find a trustworthy dimension, do not estimate from the lifestyle image. Ask the seller or measure the item in person. Cardboard cut to the product's top shape can reveal awkward corners that a tape rectangle misses.
Six small-patio layouts worth testing
Six-layout atlas
Choose one primary use and give it the honest footprint.
The route and door remain visible in every plan.
- Coffee for twoTwo seats + small tableBest where chairs can pull back safely.
- Solo loungeOne deep seatPrioritise comfort over capacity.
- Bench edgeLong + shallowKeep the main route continuous.
- FoldawayActivity on demandStore securely when weather changes.
- Work perchSlim desk + one chairShade the screen and secure light furniture against wind.
- Planting stripNarrow pots + one stoolKeep drainage, the door, and the exit route clear.
Use real product dimensions or the exact furniture you already own. Add arms, feet, braces and any pulled-out, reclined or opened position. These plans describe relationships, not standard furniture sizes.
1. The end-zone cafe
Best for: a narrow rectangle with a useful end wall or boundary.
Put two compact seats and a small table at the far end, leaving the route along one side. Angle the chairs only if their back corners and the people using them remain out of the path.
Tape test: mark both seats in use. Enter carrying two cups, sit in each chair and let the other person leave first.
Usually works because: the group becomes a destination rather than an obstacle halfway through the space.
Often fails because: the table is small but the knees are not; the far-end drain disappears; or the furniture creates a climbable step near a railing where children have access.
2. The side-wall lounge
Best for: a shallow balcony or courtyard where two facing seats would consume the route.
Run one compact two-person seat, or two armless chairs, along a solid side wall. Place a movable table beside the seat rather than opposite it. Keep the open side for circulation.
Tape test: outline the full seat depth and table in both its useful and parked positions. Have one person stand while the other stays seated.
Usually works because: it removes the coffee-table pinch point and lets one edge do most of the furnishing work.
Often fails because: the seat is too deep, a casement window cannot open, drilling is prohibited or a loose lightweight table becomes a windborne object.
The same circulation principle appears indoors. See Small Living Room Layout Mistakes That Shrink Your Space for furniture scale and route tests that translate well outside.
3. The L-corner with an open runway
Best for: a square courtyard or tiny backyard with two safe, usable solid edges.
Make an L along adjacent sides, ending the short return before it squeezes the route. Leave the opposite diagonal open. Add a movable table only if people can leave without lifting it first.
Tape test: seat the largest realistic group, then have each person stand and leave in turn. Open any storage lid while everyone is still seated.
Usually works because: conversation stays at the perimeter while the diagonal preserves a sense of space.
Often fails because: bulky arms close the corner, storage lids become trapped or the short return blocks a mobility aid or serving route.
4. The solo retreat plus guest perch
Best for: one primary user, an irregular corner or a space that cannot honestly support two full-time lounge seats.
Give the best light and protection to one comfortable chair. Add a properly rated folding guest chair that has a safe place to wait when closed. Put the landing surface beside the main chair and outside the route.
Tape test: test the everyday setup first, then add the guest seat fully open. Enter, close the door and let the guest leave.
Usually works because: daily comfort is not sacrificed for a group that rarely appears.
Often fails because: the folded chair blocks the indoor room, an attractive stool is not rated as seating or stored pieces can fall, obstruct or invite climbing.
5. The slim dining edge
Best for: a ground-level courtyard or patio where eating matters more than lounging and chairs can pull back safely.
Place a narrow free-standing table along a solid wall, with chairs on the open side or at the ends. This is not advice to attach furniture to a wall or railing; any fixing needs permission, an appropriate specification and correct installation.
Tape test: mark the table, braces and chairs both tucked and occupied. Sit, stand, let someone pass and identify where a tray lands before serving.
Usually works because: one table edge shares a boundary instead of floating in the centre.
Often fails because: the tabletop fits but chair movement does not, a window is blocked or an indoor electrical product is brought outside for convenience.
6. The two-mode reset
Best for: renters, multipurpose courtyards and spaces that sometimes need to be clear.
Choose one everyday seat and approved folding or nesting pieces. Draw a quiet daily mode and a temporary social or dining mode. Assign every movable piece a stable, dry storage position.
Tape test: rehearse both modes. One person should be able to reset the space without unsafe lifting, leaning over a railing or blocking the interior room.
Usually works because: it accepts that a tiny floor may need different jobs at different times.
Often fails because: folded pieces are bulkier than expected, textiles trap moisture in storage or the reset is irritating enough that it never happens.
Before shopping for the second mode, try the No-Buy Home Reset. You may already own the guest perch or side surface the layout needs.
Worked example: a 2.4 by 1.65 metre balcony
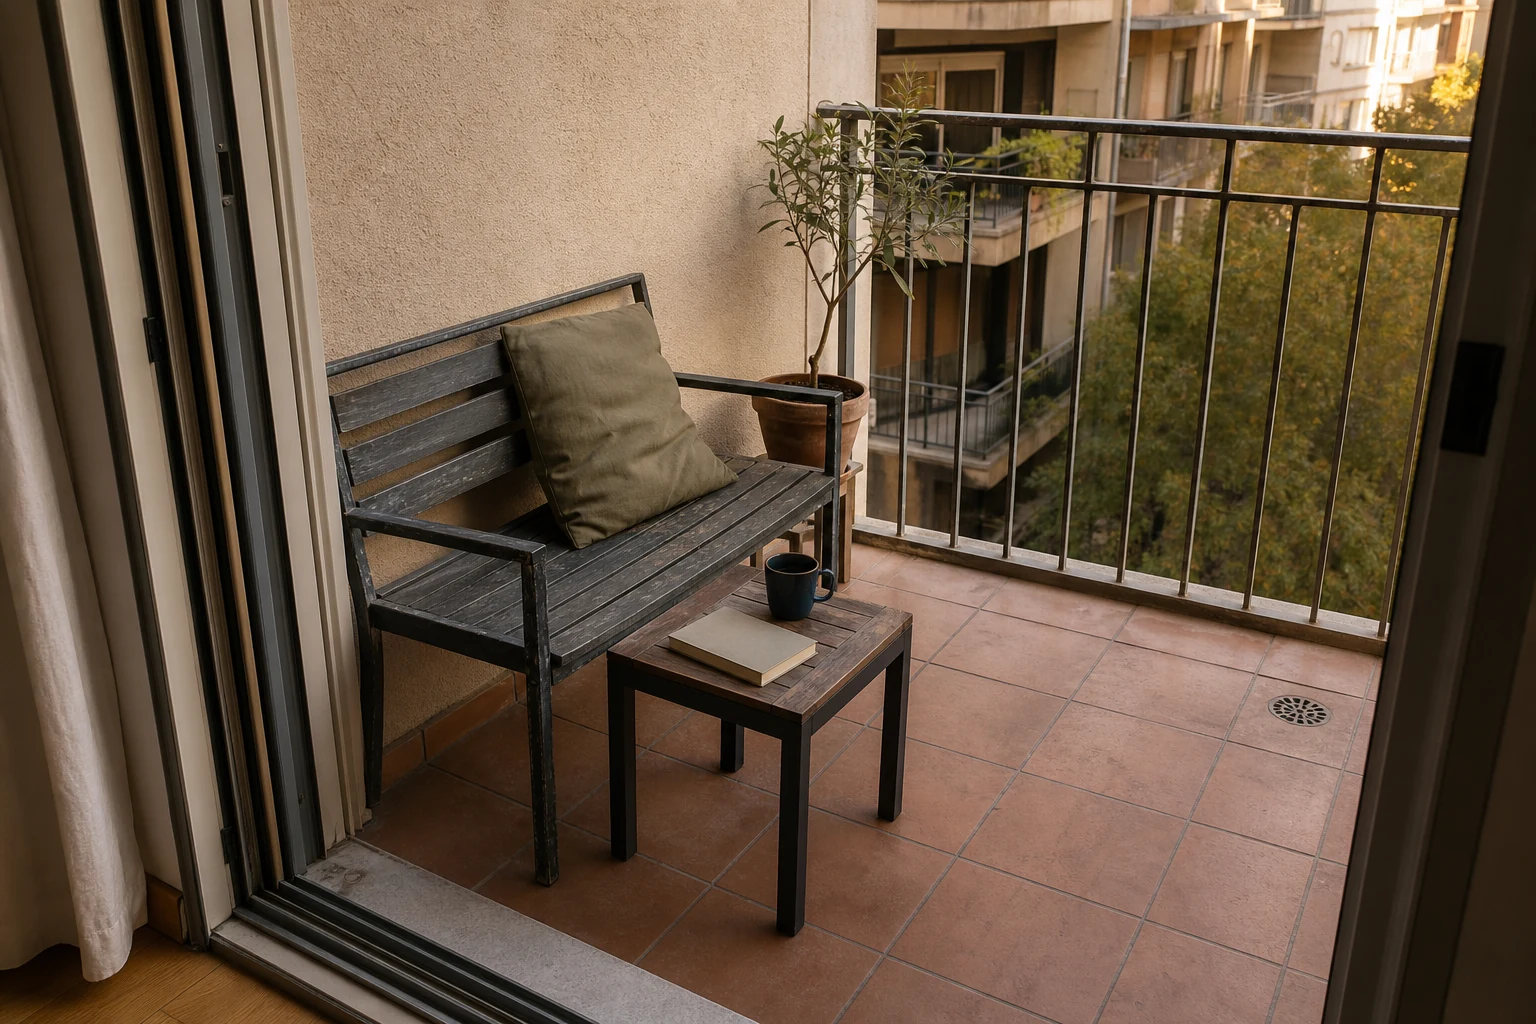
Imagine a balcony 2.4 metres long and 1.65 metres deep (about 7 feet 10 inches by 5 feet 5 inches). It has an offset sliding door, a solid wall on the left, a railing on the outer edge and a drain near the front-right corner. The daily jobs are solo reading and coffee for two. Afternoons are brighter and windier.
Two chairs facing the view look appealing on paper, but they would consume most of the shallow depth and place furniture near the exposed edge. The side-wall lounge is the stronger first test.
The example tape plan uses:
- a 1.25-by-0.68-metre footprint for a compact two-person seat along the solid wall;
- a 0.38-metre square for a movable side table beside the seat;
- an approximately 0.9-metre route on the right, from the sliding door towards the drain;
- no textile or furniture over the drain;
- no railing-mounted table, screen, planter or improvised wind tie.
These dimensions are illustrative, not prescribed clearances. Tape the exact seat, open the slider and use both ends of the bench. Carry a tray. Reach the drain. If cushions come inside after use, identify their indoor landing place before calling the outdoor plan complete.
The deliberately spare result is one good seat, one movable surface and one protected route. Consider a rug only after observing drainage and drying. Then tape its perimeter and check the threshold. The living-room rug-sizing guide helps with visual borders and furniture relationships, but outdoor exposure and slip risk still need their own checks.
Stop conditions no floor plan can solve
Some constraints do not invite a clever workaround. They tell you to pause.
Permission, structure and waterproofing
Check the lease, building or owners-association rules, applicable local requirements and product instructions before adding, attaching or heavily loading anything. Never infer structural capacity from the slab's appearance or a neighbour's setup. This guide gives no load advice.
Heavy planters, filled storage, structures, screens and attachments may need written approval and qualified assessment. Do not drill waterproofing, cladding, railings or structure without authorization and a suitable specification. Keep required exits, fire doors, stairs, vents, service equipment and inspection points clear. Do not redirect runoff or cover a drain.
“Renter-friendly” means reversible and permitted. It does not mean tied on, wedged in or too light for the weather.
Grills and open flame
No grill belongs in these balcony plans. The U.S. Fire Administration says not to store or use a grill on a porch or balcony. Other countries, municipalities and buildings may restrict flame, fuel and electric cooking equipment differently or more strictly.
For a ground-level patio or backyard, do not copy a single clearance from an online graphic and assume permission. Check the local fire authority, property rules, current conditions and the instructions for the exact appliance. If any one prohibits the equipment or location, leave it out of the plan.
Children, windows and exposed edges
Furniture can become a step. Where children live or visit, assess the railing, low wall and any window opening onto or above the space before arranging seating, tables, storage or movable objects.
The U.S. Consumer Product Safety Commission says ordinary window screens do not prevent falls and points to properly installed and maintained guards or safety netting for relevant hazards. Any device must suit the particular opening and preserve required emergency escape. Do not improvise a barrier, defeat an exit or assume that moving a chair a token distance from a railing removes the climbing risk.
Avoid creating steps or handholds near an exposed edge. Anchor applicable furniture against tip-over only in accordance with product instructions and building permission. Use active supervision, and seek local building-management or qualified child-safety advice when the permitted protection is uncertain.
Finish the zone without filling it
Occupied footprint card
Furniture dimensions end where body space begins.
Add the chair pull-back, knees, serving reach, and door movement.
- ProductClosed objectThe listed dimension.
- In useObject + bodyThe honest activity footprint.
- Weather-safe routeOperation + exitThe boundary that stays clear.
Once the layout survives the route, weather and rule checks, it needs only three finishing decisions.
Choose one visual anchor. Let the seat, an existing textile or one outdoor-suitable object carry the strongest colour. Use How to Build a Whole-Room Colour Palette From One Thing You Love to pull a restrained scheme from it. Exposure and care instructions still decide whether each material belongs outside.
Give light a job. Entry, sitting and serving are different tasks. The layered-lighting guide explains ambient, task and accent roles. Outdoors, use only products, connections and power arrangements approved for the location and weather exposure. A casual indoor extension lead across a threshold is not a styling detail; it is a reason to change the plan.
Design the reset. Decide where cushions, folding chairs and small objects go when rain arrives or the floor needs cleaning. If everything migrates into the doorway, the patio has exported its clutter indoors. A basket or shelf helps only when it is permitted, stable, weather-suitable and outside the route.
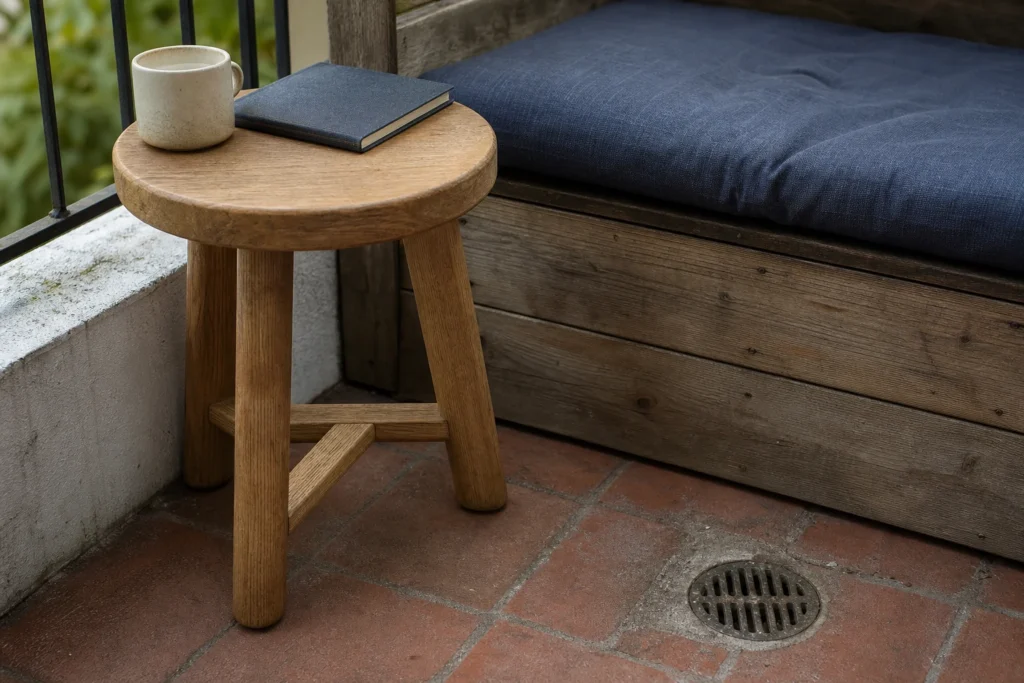
The 20-minute tape test
Do not begin with a product tab. Take a tape measure, paper and removable low-tack tape outside.
Minutes 0–5: map the fixed edges. Draw the boundary, openings, threshold, drain, exposed edge and service points.
Minutes 5–10: reserve the route. Tape the continuous path and the working area around anything that must remain accessible.
Minutes 10–15: test one layout. Mark the largest furniture footprint in its in-use position. Add the table, open lid or guest chair only if the main piece still works.
Minutes 15–20: rehearse real life. Enter, close the door, sit, stand, carry, reach and reset. Repeat with the person or mobility aid the space needs to serve.
Write down the first point of failure. That result is more useful than a shopping list. It may tell you to choose a shallower seat, move a table beside rather than in front, abandon a pair of chairs or keep the space in two modes.
A small patio succeeds when its route is easy, its purpose is honest and every item earns the floor it occupies. The aim is not to fit the most. It is to end the daily argument between the door, the weather and the way you actually want to sit outside.
Sources and scope
- U.S. Access Board: Chapter 4, Accessible Routes and Chapter 3, Clear Floor or Ground Space and Turning Space — technical context for covered U.S. settings, used here only as optional planning references.
- U.S. Consumer Product Safety Commission: Childproofing Your Home — window-fall, balcony and furniture tip-over guidance.
- U.S. Fire Administration: Outdoor Fire Safety — U.S. porch, balcony and outdoor-fire guidance.
This article offers general planning information. It does not replace a lease, building approval, product specification, local code, accessibility assessment, fire-safety direction or structural advice.
About the visuals in this guide
These are original Dealsmaster editorial illustrations produced with AI assistance for explanation and inspiration. They do not document a real household, tested installation, reader result, or professional inspection.