Curtains look effortless only after the measurements agree. The rod must relate to the wall and window, the open panels need somewhere to stack, the heading must produce enough fullness, and the hem must finish at a length the household can actually live with.
“Hang them high and wide” is useful shorthand, but it is not a complete instruction. Too high can crowd a cornice or expose an awkward strip above the frame. Too wide can collide with a wall, cabinet or neighbouring window. Floor-length fabric can make a room feel taller, but not when it covers a heater, catches under a door or turns every cleaning day into a negotiation.
This guide separates flexible decorating ranges from safety and product requirements. It shows what to measure before buying a rod or panels, how to calculate width and fullness in metric and imperial units, how to choose a practical finished length, and what changes for rentals, bay windows, sliding doors, children and difficult architecture.
Curtain measurements at a glance
| Decision | Useful starting point | Measure from | Adjust for |
|---|---|---|---|
| Rod height | 4–8 in / 10–20 cm above frame | Top of window frame | Ceiling, cornice, heading, brackets and wall structure |
| Rod extension | 4–8 in / 10–20 cm per side | Outside edges of frame | Stack-back, side walls, cabinets and adjacent windows |
| Woven-panel fullness | About 1.5–2 times rod/track width | Usable span between stops/finials | Heading system, fabric weight, pattern and maker guidance |
| Sheer fullness | Often 2–3 times rod/track width | Usable span | Desired privacy, weave and heading |
| Floor clearance | About 3/8–3/4 in / 1–2 cm above floor | Hanging point of hook/ring/track | Uneven floors, cleaning, shrinkage and fabric movement |
These are decorating tests, not universal standards. Ready-made systems and custom work use different measuring conventions. Follow the instructions for the exact heading, rod or track.
1. Check the window, wall and obstacles before measuring
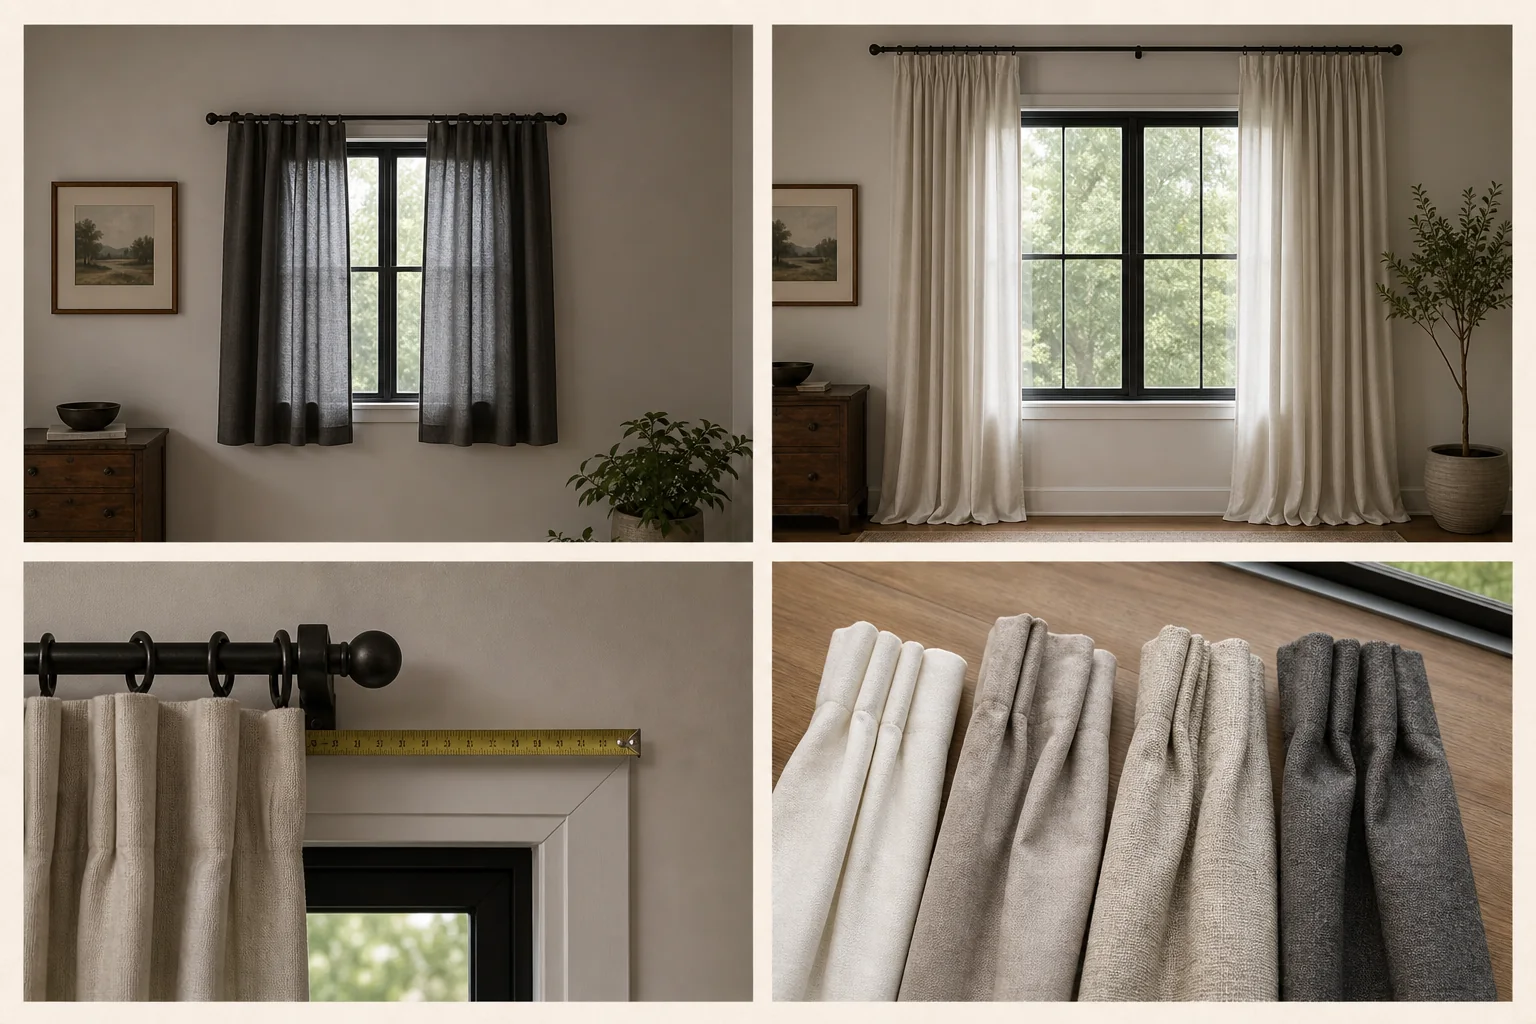
- 01Low + narrow
- 02High + wide
- 03Measure the wall
- 04See the fullness
Begin with the curtain open, not closed. The open position determines whether the treatment can reveal useful daylight, clear a handle and sit without crowding the glass.
Record the architecture
- Window-frame outside width and height
- Glass width and height
- Distance from frame top to ceiling or cornice/crown moulding
- Distance from each frame side to the nearest wall, cabinet, door, window or artwork
- Sill depth and projection
- Radiator, heater, vent, air-conditioning unit or floor register position
- Handles, locks and the full opening path of casement, tilt-turn or inward-opening windows
- Wall material and likely safe bracket locations
Measure width at the top, middle and bottom when fitting inside a recess; older frames may not be square. Measure the floor-to-rod drop at the left, centre and right. A floor that varies by 15 mm can make a “perfect” centre measurement skim one side and float at the other.
Identify safety-critical clearances
Do not cover an operable escape window, required exit, heater, radiator, vent, electrical panel, alarm or control. Curtain fabrics and lining systems differ in heat behaviour. Follow the appliance and local fire/building guidance rather than a decorative range from this article.
If the room is small, revisit why low and narrow curtains can make a small living room feel more compressed. The solution may be a higher/wider treatment, a shade, or simply a rod that lets the existing fabric clear more glass.
2. How high should the curtain rod hang?
Mounting above the frame creates a longer vertical line and prevents the heading from crowding the top of the glass. A useful first test is 4–8 inches (10–20 cm) above the frame. The right point depends on the available wall.
When there is generous space above the window
Try the rod about one-third to two-thirds of the way from frame to ceiling, then compare it with a position closer to the ceiling. A rod immediately beneath a simple cornice can look clean. Leaving an unexplained narrow strip of wall above the rod can look accidental, so view the complete wall before fixing.
When the ceiling is low
A higher rod can visually lengthen the wall, but do not force brackets into an unsuitable edge or crowd a ceiling detail. A ceiling-mounted track may be appropriate if it is designed and fixed for that construction; it is not a shortcut when the ceiling substrate or hidden services are unknown.
When the ceiling is very high
Taking fabric all the way to a high ceiling can create expensive, heavy panels and an exaggerated empty column above a small window. Test a position that relates to nearby doors, artwork or architectural lines. Taller is not automatically more elegant.
When several windows share a wall
Use one consistent rod/track height where practical, even if the frames differ slightly. This creates a calmer horizon. First confirm that every panel can finish at a functional length and that the hardware can be fixed safely along the wall.
Mark the proposed rod line with removable tape across the full width. Stand at the main doorway, sit down and photograph it. Height is easier to judge as a line than as two pencil dots.
3. How far should the rod extend beyond the window?
Extending the rod lets open fabric sit beside the glass instead of over it. Start by testing 4–8 inches (10–20 cm) beyond each side. Thick, lined or very full curtains may need more stack space; a tight wall or cabinet may permit less.
Use this simple planning equation:
Planned rod width = frame width + left extension + right extension
Example: a window frame is 140 cm (about 55 in) wide. Testing 15 cm (about 6 in) on each side gives a planned span of 170 cm (about 67 in). That is the working width before accounting for finials, brackets, returns or a telescopic rod’s overlap.
Do not measure finial to finial for curtain width
The usable hanging span may stop at brackets, end stops or returns. Check how the exact rings, carriers or pocket move. A decorative finial adds wall width but may not add curtain travel.
Unequal extensions can be correct
A window close to a side wall may need 5 cm on one side and 20 cm on the other. The curtain can still look balanced when open if panel widths and furniture explain the asymmetry. Do not centre hardware on a wall if doing so prevents a cabinet or door from opening.
4. Allow enough space for stack-back
Window elevation A–E
Five measurements describe the whole installation.
Use the finished hardware position, not the glass alone.
- AWall widthThe usable horizontal field.
- BRod spanIncluding side extension.
- CStack-backSpace for open fabric.
- DFinished dropHardware to chosen hem.
- EObstaclesHandles, vents, heaters, furniture.
Stack-back is the width occupied by a curtain when it is fully open. It depends on fabric thickness, lining, fullness, heading and the way rings or carriers compress. There is no reliable universal percentage.
If you already own the panels, gather one to the intended fullness and measure the bundle. If ordering custom work, ask the maker for expected stack-back. For ready-made curtains, mock up the folded panel width or check displayed samples.
Use the glass-reveal test
- Mark the outside edges of the window frame.
- Mark the proposed rod extensions.
- Represent the estimated open panel bundles with folded towels, paper or tape.
- Check how much glass remains covered on each side.
- Confirm the bundles do not crowd a switch, cabinet, artwork, air vent or route.
A wider rod is useful only when the wall can hold the brackets and the panels genuinely travel outward. Adding extra metal behind a curtain that cannot pass a support bracket may not reveal more glass.
5. Calculate curtain fullness without guessing
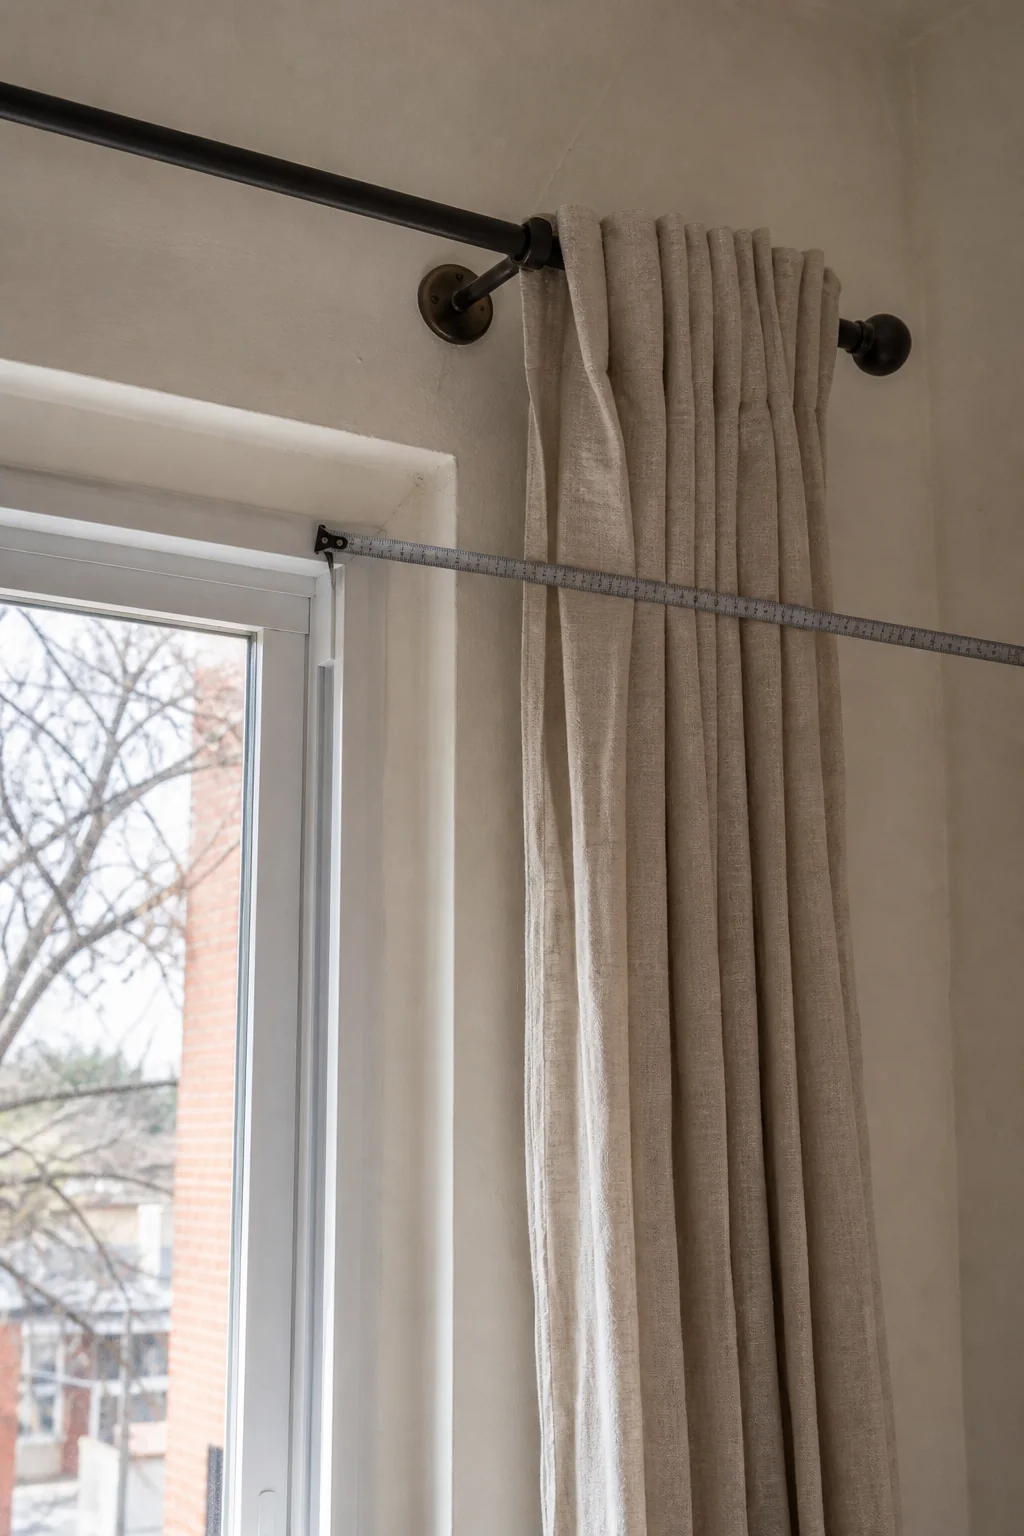
Fullness is the ratio between the flat fabric width and the span it covers when hung. A panel exactly as wide as the rod will hang almost flat when closed. Most curtains need extra width to form folds.
For many woven ready-made panels, a total flat width around 1.5–2 times the usable rod or track width is a practical starting point. Sheers often use 2–3 times for privacy and softness. Pleated and wave/ripplefold systems have their own heading specifications, so use the maker’s calculation instead of adding an arbitrary multiplier.
Total flat curtain width = usable rod/track width × chosen fullness
Example: a usable rod span is 180 cm (about 71 in). At 2× fullness, the combined flat panel width is about 360 cm (about 142 in). With two equal panels, each needs roughly 180 cm (71 in) of flat width. If ready-made panels are sold as 140 cm (55 in) each, two provide only 280 cm (110 in), or about 1.56× fullness.
That lower fullness may be fine for a crisp, lightweight look. A sheer used for daytime privacy may need more. Consider:
- Pattern: a large motif may disappear into dense folds.
- Weight: heavy fabric becomes bulky at high fullness.
- Privacy: some open weaves need more overlap when closed.
- Heading: eyelets/grommets, pencil pleats, pinch pleats, tabs and waves consume width differently.
- Centre closure: provide enough overlap or return to avoid a bright gap.
6. Choose a finished curtain length that suits the room
Measure length from the actual hanging point—not automatically from the rod top. A hook may sit below a ring, an eyelet/grommet wraps around the rod, and a track carrier changes the start point.
Floor-skimming or “kiss” length
The hem just meets the floor. It creates a tailored line but demands accurate installation and a reasonably level floor. Fabric can relax or move with humidity, so custom makers may need to account for the material.
Floating above the floor
Finishing around 3/8–3/4 inch (1–2 cm) above the floor is easier to open, vacuum and keep clean. It also tolerates minor floor variation. If the floor slopes, decide whether to keep a level hem or follow the floor with professional measuring and alteration.
A small break
An extra 1–2 inches (2.5–5 cm) creates a relaxed bend at the floor. This suits some soft fabrics but collects more dust and needs arranging.
Puddled length
Several extra inches or centimetres pool on the floor for a romantic, formal effect. It is unsuitable for many busy routes, homes with children or pets, mobility needs, robot vacuums, dust sensitivity, damp climates or curtains opened daily. Use it as an intentional styling decision, not a default sign of luxury.
Sill length
Finish roughly 3/8 inch / 1 cm above the sill so the curtain moves without dragging. This can suit kitchens, desks and radiators, provided the fabric and hardware meet the area’s safety and cleaning needs.
Apron length
Finish below the sill but above furniture, heaters or the floor. Choose the drop in relation to the wall and obstacles; an arbitrary short hem can visually divide the window.
7. Account for the heading, rings and track
Wall effect
Height and width do different jobs.
A higher line changes perceived height; side extension preserves glass and room for the stack.
- Low + narrowGlass coveredShorter visual line; less open daylight.
- High + wideWall framedLonger line; fabric clears more glass.
Eyelet/grommet curtains
Measure from the top inside edge of the eyelet where it rests on the rod, then account for the fabric standing above it. The folds project forward and backward, so confirm wall and handle clearance.
Rod pocket
The pocket consumes part of the drop and can be slow to open daily. Check the rod diameter and whether the heading includes a decorative ruffle above the pocket.
Pencil pleat or gathered tape
Different hook rows change the finished height. Set one panel on the actual hook/ring combination before final hemming. Distribute gathers evenly and keep spare cord secured according to safety guidance, away from children.
Pinch pleat
These are made to a finished width rather than gathered freely. Order for the exact usable track or pole span, including any returns and overlaps specified by the maker.
Wave/ripplefold
The track, carriers, spacing and fabric are a system. Use the supplier’s stack-back, fullness and drop calculations. Mixing components can change both appearance and operation.
Rings and clips
Measure the total drop from the point where the ring or clip supports the fabric. Clips make length adjustable but must grip securely and suit the fabric weight. Small loose components may be unsuitable around young children.
8. Plan for bay windows, sliding doors and difficult architecture
Bay or corner windows
Decide whether the treatment follows each pane inside the bay or runs across the front as one plane. Inside systems need accurate angles, corner connectors, bracket positions and stack-back. A continuous track may require professional templating and ceiling assessment.
Sliding glass or balcony doors
Keep the active opening and handle clear. Panels may stack on the fixed-glass side, split at the centre or move entirely to one side depending on the door. Protect the everyday route and any required exit; do not let fabric trail where shoes or wheels catch it.
Inward-opening and tilt-turn windows
Test the full operation before choosing an inside-mounted blind or a low rod. Curtains may need to clear the handle and swing while open. Never disable a safety or ventilation function for the treatment.
Windows close to a wall
Use asymmetric extensions, a one-way draw, a single panel or an inside treatment. Forcing matching panels into a 5 cm corner gap creates a crushed stack and may block light.
Two windows close together
Treat them as one composition if the wall between is narrow, or give each a separate treatment with a shared height. Tape both options. One long rod may need a centre support that prevents panels crossing it.
Furniture beneath the window
Move the furniture, choose sill/apron length or use a shade if floor-length fabric would bunch behind a sofa, desk or radiator. Do not trap curtains against heat sources or force air vents to blow into the fabric.
9. Choose fabric and lining for light, privacy and maintenance
Fabric affects more than colour. Hold a sample at the window during the day and at night. A pale linen-look weave may be translucent in daylight and transparent after dark when the room is lit.
- Unlined fabric: lighter stack, softer daylight and easier movement; may provide limited privacy or insulation.
- Standard lining: adds body, protects the face fabric and improves privacy; increases weight and stack-back.
- Room-darkening/blackout lining: reduces transmitted light but seams, edges and installation still allow light around the treatment.
- Sheer layer: softens daylight and can add daytime privacy; it does not guarantee night privacy when the interior is brighter.
- Washable fabric: practical only when the full panel can be cleaned and dried according to its label without impractical shrinkage or ironing.
The U.S. Department of Energy notes that the performance of window coverings depends on climate, window, product and how it is operated. Do not assume that every heavy curtain will produce the same energy saving. In a cooling-dominated climate, controlling unwanted solar gain may matter; in a cold climate, insulation and daytime solar access may lead to a different routine. Use local energy guidance and a product with relevant performance information where energy is a priority.
Colour and fabric change under artificial light. Test the sample beside the lamps you use after dark using the Dealsmaster guide to colour temperature and colour rendering.
10. Renter-friendly curtain options
Read the lease and ask before drilling. “Damage-free” depends on the surface, load, installation and removal; it is a marketing description, not a guarantee.
Tension rod
Useful inside a sound recess for lightweight fabric when the product fits the span and load. It covers more glass, may not suit wide windows and must not interfere with the sash, locks or escape opening. A falling rod can injure someone or damage glazing.
No-drill brackets
Some clamp to a suitable frame or existing blind headrail. Use only on the specified construction and within the rated span and weight. Do not clamp to a fire-rated, fragile or operable component without approval.
Adhesive hooks or brackets
Suitable only when the product explicitly supports the rod, total fabric weight, surface and loading direction. Follow cleaning, cure and removal instructions. Heavy curtains and glass-adjacent installations are poor places to improvise.
Existing track
Often the best rental option. Identify the carrier type, usable width, weight limit and compatible hooks. Clean and maintain it according to the property instructions rather than replacing it solely for appearance.
Portable screen or privacy film
When curtains cannot be mounted safely, a stable screen positioned outside the route or an approved removable film may address privacy. Check ventilation, egress, glazing compatibility, lease terms and daylight needs.
11. Installation and child-safety boundaries
Fix the hardware for the real load
Total load includes rod or track, finials, rings, both panels, lining and the force of opening and closing. Match brackets and fixings to the wall or ceiling construction. Hidden wiring or pipes may be present. If the substrate or service route is uncertain, do not drill; ask the property owner or a competent installer. Before any approved drilling or permanent mounting, use the measure–test–safety checklist to confirm scope, permission and stop boundaries.
Wide rods may need intermediate supports, but a support can block rings from travelling across the span. Plan supports and draw direction together. Do not exceed the manufacturer’s span or weight rating.
Use a safe access method
Use an appropriate, inspected ladder on a firm level surface. Do not stand on a chair or lean sideways to reach the second bracket. The U.S. National Institute for Occupational Safety and Health identifies wrong ladder selection, poor setup and overreaching as recurring fall causes, including at home.
Choose cordless window coverings around children
The U.S. Consumer Product Safety Commission warns that accessible cords on blinds, shades, draperies and other window coverings can strangle children, and says the safest option when young children are present is cordless. If an existing product has cords, use only the supplied or officially recommended tension/hold-down and safety devices, installed exactly as directed. Reducing cord length or tying it up does not eliminate every hazard.
- Keep cots/cribs, beds, chairs, toys and climbable furniture away from window-covering cords.
- Do not remove inner-cord stops, tension devices or safety components.
- Keep curtain tiebacks, chains and decorative loops out of children’s reach.
- Check the current child-safety rules where the window covering is sold and installed.
- Make sure the finished treatment does not obstruct an escape window or required exit.
Keep fabric away from heat and electrical hazards
Follow clearances for heaters, radiators, lamps, floor outlets and other equipment. Do not route electrical cords beneath curtains or rugs. Stop if hardware becomes loose, the rod bows, fabric touches a hot surface or the treatment prevents safe operation of the window or door.
The curtain measuring worksheet
Record all values in one unit first, then add conversions. Take photographs of the tape measure in place for custom orders.
- Frame width: ______
- Left wall available: ______
- Right wall available: ______
- Planned left extension: ______
- Planned right extension: ______
- Usable rod/track width: frame + left + right = ______
- Chosen fullness/system: ______
- Total flat curtain width: usable width × fullness = ______
- Number of panels and flat width each: ______
- Frame top to ceiling/cornice: ______
- Planned hanging point height: ______
- Drop to left/centre/right floor or sill: ______ / ______ / ______
- Chosen finished length and clearance/break: ______
- Estimated stack-back per side: ______
- Obstacles, heat, vents, handles and opening path checked: yes / no
- Wall/ceiling construction and safe fixing method confirmed: yes / no
Before ordering, repeat every critical measurement with another person if possible. Confirm whether a custom maker wants bracket-to-bracket, track length, finished curtain width, pole width excluding finials or another convention.
The before-you-buy checklist
- The full window operation and required escape route remain clear.
- Rod height and width are taped on the wall and viewed from the room.
- Usable span excludes finials and any blocked travel.
- Stack-back has been estimated for the actual fabric and heading.
- Total panel width produces the intended fullness.
- Drop is measured from the real hanging point at left, centre and right.
- Finished length suits cleaning, mobility, children, pets and climate.
- Heaters, radiators, vents, furniture and handles remain clear.
- Hardware and fixings suit the substrate, span and total load.
- Child-safe cordless operation is chosen where children may be present.
- Fabric has been tested for privacy and colour by day and night.
- Care, alteration, return and installation requirements are understood.
Frequently asked questions
Should curtains touch the ceiling?
Not necessarily. A rod or track close to the ceiling can create a tall line, but it must relate to the cornice, brackets, wall/ceiling structure and window. Tape the line first. A very high ceiling may look better with a lower architectural reference.
How far above the window should a curtain rod be?
About 4–8 inches (10–20 cm) is a useful starting test. Adjust to the space between frame and ceiling, the heading depth and safe fixing positions. The rod should not crowd moulding or force unsuitable anchors.
How far should the rod extend past the window?
Start with 4–8 inches (10–20 cm) on each side, then increase or reduce it based on stack-back and nearby obstacles. Thick lined panels may need more wall to clear the glass.
How wide should two curtain panels be?
For many woven panels, aim for a combined flat width around 1.5–2 times the usable rod width; sheers often use 2–3 times. Use the heading maker’s specification where provided. Divide the required combined width by the number of panels.
Should curtains touch the floor?
They can kiss the floor, float 1–2 cm above it, break slightly or puddle. A small float is practical for daily opening and cleaning. Choose for the room and household, not a universal rule.
Can curtains hang over a radiator?
Do not assume so. Fabric can obstruct heat flow and may create a hazard depending on the appliance and material. Follow the radiator/heater manufacturer and local fire guidance. Use a shorter treatment or blind/shade when full length conflicts with required clearance.
Can I use adhesive hooks for a curtain rod?
Only if a product explicitly supports that use, surface, span, total curtain weight and loading direction, and the lease permits it. Heavy panels, wide spans and installations above glass are not suitable for improvisation.
Why do my closed curtains still look flat?
The combined panel width may provide too little fullness, or the heading may not be gathered/set correctly. Measure the usable span and flat panel widths, then compare them with the heading system’s recommended ratio.
What if ready-made curtains are the wrong length?
Choose the closest longer size that can be altered without disrupting a border or pattern, or adjust the rod only if the new position still suits the window and safe fixing. Do not mount the rod awkwardly just to avoid a simple hem.
Measure the open window, not only the closed curtain
A successful treatment looks good when closed, but it also lives beside the glass every day. Give the open fabric somewhere to go. Let the window operate. Let daylight enter. Let the hem clear the life happening beneath it.
High and wide is not a command. It is an invitation to test a more generous frame around the window—and then refine it until the fabric, wall, light and household work together.
About the visuals in this guide
These are original Dealsmaster editorial illustrations produced with AI assistance for explanation and inspiration. They do not document a real household, tested installation, reader result, or professional inspection.
Safety and performance sources
Decorative mounting ranges and fullness ratios in this guide are flexible planning aids. Product, child-safety, fire, egress and installation requirements vary internationally.
- U.S. Consumer Product Safety Commission: Window Covering Cords—Go Cordless
- UK Office for Product Safety and Standards: Child Safety—Blind Cords
- Health Canada: Window Covering Safety
- U.S. Department of Energy: Residential Windows and Window Coverings—Installed Base and User Behaviour
- U.S. Department of Energy: Energy Savings from Window Attachments
- U.S. National Institute for Occupational Safety and Health: Ladder Safety
- U.S. Fire Administration: Home Fire Escape Plans
Editorial note: Metric conversions are rounded for practical planning. Custom curtain makers may require millimetres and their own exact measuring convention.